Showing posts with label root. Show all posts
Showing posts with label root. Show all posts
Sunday, April 5, 2015
How To Root Sony Xperia M Easily
Sony Xperia M is a very popular mobile phone till now because of its features and price. We all love Sony and knows that Sonys products are trustable and better than other manufacturers in terms of specifications and the hardware they use.

If we compare any Micromax/Karbonn/Lava Quad-Core device with Sonys Quad-Core, then Sony will win because of its hardware acceleartion. Indian manufacturers uses poor hardware which is very cheap and affordable. Thats the reason why Indian devices are more affordable than Sony/HTC/Samsung even when its a Quad-Core device. Sony uses premium hardware, good RAM, good processor and not SoCs.
Sony Xperia M was released in June, 2013 and we think it has some outdated specifications, but the development support of this device is very good. It has a 4 inch capacitive touch screen with 245 PPI pixels density and a 480 x 800 pixels resolution. You get 1 GB of RAM in this device which I think is not bad for a device which is launched in mid of 2013 at low price. Also, the processor is nice. It has Qualcomm Snapdragon S4 Plus MSM8227 Dual-core 1 GHz Krait CPU which is nice and can be compared with Cortex A9. GPU is also good. The mobile phone has Adreno 305, which can be again, compared with some good GPUs. Other specifications are also decent, but I am now going to show you how to root Soiny Xperia M.
Prerequists
If we compare any Micromax/Karbonn/Lava Quad-Core device with Sonys Quad-Core, then Sony will win because of its hardware acceleartion. Indian manufacturers uses poor hardware which is very cheap and affordable. Thats the reason why Indian devices are more affordable than Sony/HTC/Samsung even when its a Quad-Core device. Sony uses premium hardware, good RAM, good processor and not SoCs.
Sony Xperia M was released in June, 2013 and we think it has some outdated specifications, but the development support of this device is very good. It has a 4 inch capacitive touch screen with 245 PPI pixels density and a 480 x 800 pixels resolution. You get 1 GB of RAM in this device which I think is not bad for a device which is launched in mid of 2013 at low price. Also, the processor is nice. It has Qualcomm Snapdragon S4 Plus MSM8227 Dual-core 1 GHz Krait CPU which is nice and can be compared with Cortex A9. GPU is also good. The mobile phone has Adreno 305, which can be again, compared with some good GPUs. Other specifications are also decent, but I am now going to show you how to root Soiny Xperia M.
Prerequists
- Sony Xperia M with 70% battery charged.
- A simple application which is available in the Downloads section.
- USB Debugging enabled: Open settings application. Scroll to the bottom and select About phone. Open it and tap 7 times on Build number. After you will tap 7 times on the build number, you will see You are a developer now! message. Then see the rest of guide.
- Your device may freeze for some seconds seconds while performing this guide, so dont be panic.
- Nothing else, except some basic knowledge of using and installing applications on android mobile phones.
Download
- Framaroot Application. Use only the application which has Gandalf exploit. Get Framaroot from its official thread on XDA: Click HERE (Download Framaroot 1.5.3 application).
- Nothing else.
How To Root Sony Xperia M
- Download the application from your PC.
- Move it to your SD Card.
- Enable USB Debugging in your device (how to do so given in the Prerequists).
- If you have installed an appliaction from SD Card, then install it, and if you are installing it for the first time then see it how to do so: Tap on the application. You will see a popup which will warn you to install the application or not. Just select Yes and it will take you to another menu where you will see some options Enable install applications from unknown sources option.
- Click on Open the application and select Superuser. Now select SuperSU from the drop-down list.
- Click on Gandalf exploit to root your Sony Xperia M.
- You will see a message Success ...:-) Superuser and su binary installed. You have to reboot your device in the popup which means you are rooted now.
- Reboot your device to root it.
You can try downloading Root Checker application to confirm that you are rooted or not. Feel free to comment here, in this blog.

How To Root Micromax A250 Canvas Turbo Without PC
Micromax A250 Canvas Turbo is the latest flagship of Micromax. The device is supercharged and is having mind-blowing features and is better than all the other Indian Android Devices because of its RAM and Processor. The device was released in late October (Oct 31, 2013) and it became very popular because of its RAM.
The device is having 5 inch Capacitive touchscreen with 16M colors and IPS FHD CGS display. The display size of Canvas Turbo is 1080 x 1920p. It is dual SIM device which supports dual SIM standby too. The device is powered with Quad Core MediaTek MT6589T Chipset which is clocked to 1.5 GHz means 1.5 GHz Quad Core MediaTek MT6589T. The processor is cool and great but the RAM is also not less! Yeah! it is not 512 MB, not even 1 GB. Canvas turbo is provided with 2 GB RAM which is damn big, I mean if you are even a hardcore gamer, still the RAM will be free I can guaranty. The GPU of this device is okay, I mean not too good and not too bad. The device is having PowerVR SGX 544MP GPU which is clocked at 357MHz. I think you can play any game in this device. There is a 16 GB Internal Memory for your files and allwhich can be further expanded up to 32 GB via SD Card which cannot be expanded! The OS provided with the device is latest Android 4.2.1 Jelly Bean OS, huh Micromax! Its your second or third device having Android 4.2 Jelly Bean, there is also a Jelly Bean 4.3 update, you know Micromax? Anyway, Micromax said that they will provide and update for this device. The device features 13 Mega Pixels camera LED Flash, 360 degree Panorama, Auto Focus etc. and a 5 Mega Pixels front camera which is good. You can record videos @1080p HD Resolution. It has 3G, Bluetooth, USB port, Wi-Fi etc.
Features highlight of Micromax A250 Canvas 5 Turbo:
The device is having 5 inch Capacitive touchscreen with 16M colors and IPS FHD CGS display. The display size of Canvas Turbo is 1080 x 1920p. It is dual SIM device which supports dual SIM standby too. The device is powered with Quad Core MediaTek MT6589T Chipset which is clocked to 1.5 GHz means 1.5 GHz Quad Core MediaTek MT6589T. The processor is cool and great but the RAM is also not less! Yeah! it is not 512 MB, not even 1 GB. Canvas turbo is provided with 2 GB RAM which is damn big, I mean if you are even a hardcore gamer, still the RAM will be free I can guaranty. The GPU of this device is okay, I mean not too good and not too bad. The device is having PowerVR SGX 544MP GPU which is clocked at 357MHz. I think you can play any game in this device. There is a 16 GB Internal Memory for your files and all
 |
| Credits goes to GSMArena |
Features highlight of Micromax A250 Canvas 5 Turbo:
- 5 inch Capacitive touchscreen with 16M colors and IPS FHD CGS Display having 1080x1920 pixels resolution
- 1.5 GHz Quad Core MediaTek MT6589T Chipset
- 2 GB RAM and 16 GB ROM
- PowerVR SGX 544MP GPU
- Android 4.2.1 Jelly Bean OS
- 13 MP Camera and 5 MP front Camera
- 2000 mAh Battery backup
The specifications of the device is great but still it doesnt have many ROMs when it compared with even low cost Android devices, this is because of the high price!
Prerequisites
- Micromax A250 Charged up to 70%
- USB Debugging Enabled
[Open Settings of your Android and scroll to the end & select About Phone. Find at tap 7 times continuously on Build Number. There will be another option Developer Options when you will go back to settings. Open it and enable it. Now enable USB Debugging too]
Downloads
- Framaroot 1.6.0 APK- Click HERE.
How To Root Micromax A250 Canvas Turbo
- Download the application and move it to your Internal SD Card by USB data cable or download it from your phone directly.
- Install the application by tapping on it [from any file manager, say ES File Manager]. [If you are doing if first time then you will see a popup which will be having Unknown Sources warning. Tap Yes there and enable the checkbox of Unknown Sources]
- Open the Frmaroot application from your application drawer.
- Select Super SU from the drop down menu and click on Boromir.
- You will see a successful message with Success :-) ... Superuser and su binary installed. You have to reboot your device message in it.
- Reboot your device :)
Youre rooted now! Yeah! If you saw Super SU application installed in your Application Drawer, then it means youre rooted. If you are not sure, then download Root Checker and check from it! You can shoot out a comment here if you are confused in any step!
See a simple video made by me on Rooting Micromax A250 Canvas Turbo on YouTube:
See a simple video made by me on Rooting Micromax A250 Canvas Turbo on YouTube:
How to root Google Nexus 5
Ok, the Google Nexus 5 has been out there for a while and we think its about time for a root tutorial. So, without further ado, here is our step by step guide with images.

As always, gaining root access is risky, and if you do not follow the procedure properly, you can end up with an unusable phone. Also, please note that all data is deleted during the operation so back up all your data first. Neither AndroidPIT or myself will be held responsible for anything unflattering that may happen to your Nexus 5.
The following procedure is valid only for the Google Nexus 5.
Ensure that you have Administrator rights on Windows (if you do not know what these are, you probably havent got them).
Make sure your Nexus 5 has at least 60% of battery. 70% is better, and fully charged is... you get the drift.
Windows 32- & 64-bit
Mac OS X 32- & 64-bit
Linux 32- & 64-bit
The general procedure is the same as on Windows, but the commands to use in the terminal are different on Mac and Linux. This tutorial is for a PC running Windows.
Custom Recovery:
ClockworkMod (CWM)
Root:
SuperSU v1.65
2. Launch "SDK-Manager.exe" and install the following packages:

2. Reboot into fastboot mode by pressing and holding the Volume Down + Power button.
3. Connect your Nexus 5 to your computer with a USB cable.
4. Open the Android SDK > SDK > Platform-Tools directory then right-click in an empty area while holding the shift key.
5. Click "Open the command prompt here".
6. Enter the following command:

If you get a serial number, its good and you can continue. Otherwise, your drivers are not installed correctly.
7 . Enter the following command:
9 . Enter the following command:
2. Reboot into fastboot mode (as in Section II)
3. Copy the custom recovery file downloaded earlier into the Android SDK > SDK > Platform-Tools directory. Rename the file "recovery.img". If it does not work, simply rename the file "recovery" without the "img".
4. In the command prompt window (as per Section II), enter the following command:

5. On your Nexus 5, use the unusable Volume buttons to select the "Restart bootloader" option and press the Power button.
6. You can now verify the custom recovery installation by entering "Recovery Mode". If you arrive on the CWM screen, the recovery is all good.
2 . Reboot into fastboot mode (as in Section II) and choose Recovery Mode.
3 . Choose the "install zip from sdcard" option.
4 . Select "choose zip from sdcard".

5 . Locate the "SuperSU v1.65" file and select it.
6 . Confirm with "Yes".
7 . Once the file installation is complete, restart by selecting "go back" then "reboot now".
8 . Final check: install an application to verify root such as Root Checker. If everything is green, its all good! Congratulations, your Google Nexus 5 is rooted!
Read more »
As always, gaining root access is risky, and if you do not follow the procedure properly, you can end up with an unusable phone. Also, please note that all data is deleted during the operation so back up all your data first. Neither AndroidPIT or myself will be held responsible for anything unflattering that may happen to your Nexus 5.
The following procedure is valid only for the Google Nexus 5.
Prerequisites
Install the Nexus 5 drivers on your PC (just plug it in and wait a few minutes, it will install them automatically).
Ensure that you have Administrator rights on Windows (if you do not know what these are, you probably havent got them).
Make sure your Nexus 5 has at least 60% of battery. 70% is better, and fully charged is... you get the drift.
Downloads
Android SDK:
Windows 32- & 64-bit
Mac OS X 32- & 64-bit
Linux 32- & 64-bit
The general procedure is the same as on Windows, but the commands to use in the terminal are different on Mac and Linux. This tutorial is for a PC running Windows.
Custom Recovery:
ClockworkMod (CWM)
Root:
SuperSU v1.65
I. Installing ADB and Fastboot
1. Download the Android SDK for your computers operating system and unzip it in a folder named "Android SDK.
2. Launch "SDK-Manager.exe" and install the following packages:
- Tools > Android SDK Tools, Android SDK Platform-Tools
- Extras > Android Support Library, Google USB Driver
II. Unlocking the bootloader
1. Turn off your Nexus 5.
2. Reboot into fastboot mode by pressing and holding the Volume Down + Power button.
3. Connect your Nexus 5 to your computer with a USB cable.
4. Open the Android SDK > SDK > Platform-Tools directory then right-click in an empty area while holding the shift key.
5. Click "Open the command prompt here".
6. Enter the following command:
fastboot devices
If you get a serial number, its good and you can continue. Otherwise, your drivers are not installed correctly.
7 . Enter the following command:
fastboot oem unlock8 . On your Nexus 5, confirm with "Yes" using the Volume keys to move and the Power button to confirm.
9 . Enter the following command:
fastboot reboot
III. Installing the custom recovery
1. Turn off your Nexus 5
2. Reboot into fastboot mode (as in Section II)
3. Copy the custom recovery file downloaded earlier into the Android SDK > SDK > Platform-Tools directory. Rename the file "recovery.img". If it does not work, simply rename the file "recovery" without the "img".
4. In the command prompt window (as per Section II), enter the following command:
fastboot flash recovery recovery.img
5. On your Nexus 5, use the unusable Volume buttons to select the "Restart bootloader" option and press the Power button.
6. You can now verify the custom recovery installation by entering "Recovery Mode". If you arrive on the CWM screen, the recovery is all good.
IV. Root
1 . Reboot your Nexus 5 normally. Copy the previously downloaded file "SuperSU v1.65" to the root of your smartphone.
2 . Reboot into fastboot mode (as in Section II) and choose Recovery Mode.
3 . Choose the "install zip from sdcard" option.
4 . Select "choose zip from sdcard".
5 . Locate the "SuperSU v1.65" file and select it.
6 . Confirm with "Yes".
7 . Once the file installation is complete, restart by selecting "go back" then "reboot now".
8 . Final check: install an application to verify root such as Root Checker. If everything is green, its all good! Congratulations, your Google Nexus 5 is rooted!
Saturday, April 4, 2015
How to Root the Verizon Samsung Galaxy Note 3
Earlier there was a way to root the Samsung Galaxy Note 3, but method was limited to only some models.
Now with the Verizon Samsung Galaxy Note 3, there comes a way to allow you to easily root the device. Though there isnt way yet to install a custom recovery, such as TWRP or CWM yet, though were sure this is in the works.

Youll first need to install the newest Samsung Drivers (1.5.27.0) for your PC, which you can get from here.
Once the drivers are installed, reboot your PC.
The following instructions for rooting the Verizon Samsung Galaxy Note 3 are provided by "designgears" from XDA Forums.
You need to follow the instructions exactly, and remember, use at your own risk!
This process will also wipe your phone, so any apps and settings will have to be reinstalled after the process is finished.
Read more »
Now with the Verizon Samsung Galaxy Note 3, there comes a way to allow you to easily root the device. Though there isnt way yet to install a custom recovery, such as TWRP or CWM yet, though were sure this is in the works.
Youll first need to install the newest Samsung Drivers (1.5.27.0) for your PC, which you can get from here.
Once the drivers are installed, reboot your PC.
The following instructions for rooting the Verizon Samsung Galaxy Note 3 are provided by "designgears" from XDA Forums.
You need to follow the instructions exactly, and remember, use at your own risk!
This process will also wipe your phone, so any apps and settings will have to be reinstalled after the process is finished.
How To Enter Download Mode
Pull the battery out, unplug the usb cable, reinsert the battery. Hold Volume Down + Home + Power. Follow the instructions on the screen.
Rooting Instructions
- Remove the external sdcard (if you have one)
- Boot into bootloader mode (see method above)
- Flash Root_de_la_Vega.tar.md5 with Odin v3.09 (put in AP slot, dont change any other settings, click start)
- Let your device fully boot after flashing has completed
- Copy the contents of Root_de_la_Vega.zip to the root of the internal sdcard
- /sdcard/
- root_de_la_vega.sh
- root_files (folder)
- Reboot (very important!)
After fully booting delete the files from the internal sdcard that were added previously
- /sdcard/
- root_de_la_vega.sh
- root_files (folder)
- Reboot (extremely important!)
Reinsert the external sdcard (if you have one)
Thats all! Enjoy Root!
Required Files
FILENAME: Root_de_la_Vega-SM-N900V.7z (Mega)
SIZE: ~1.24 GB
MD5: 4EFE88F8181776372EBE0185F3BC2A94
Mirrors
Torrent
How To Root Karbonn Smart A26
Hey guys, I saw Karbonn A26 and found that it was a great device. I used it for some hours and was impressed with the device. I rooted it after some minutes and tried some applications. Anyway, the speed of the device was good. I also saw that the body design was superb. The best part of the device was the rate of it. The device is very cheap and you can get it of 5.5k from some online megastores. The screen size was also impressive although the screen display was poor. The brightness is also very less of this device when we compare it to other devices. Other things are good like Benchmarks, I got 40 fps in the benchmark test, and I was shocked to see that because the devices usually get 25-30 in this price range. Okay, lets see the specifications of Karbonn A26 first.
Karbonn Smart A26 [Quick] Specifications
Karbonn Smart A26 [Quick] Specifications
- 5 Inch FWVGA TFT Display with 480x854 resolution
- Android, v4.1.2 Jelly Bean
- 4 GB Internal memory which can be further expanded up to 32 GB by SD Card
- 5MP rear camera and VGA front camera
- MediaTek MT6572 1.3 GHz Dual Core Processor
- 512 MB RAM
- A-GPS support
- 2G, WiFi, Bluetooth
Oops, the device is having MediaTek MT6572 chipset! You might be thinking why I am saying this? Im saying this because MediaTek MT6572 chipsets doesnt have ROMs like MiUi, LeWa OS etc. so developers cant enjoy the phone. I thought of taking the device for some days so I can make some cool ROMs for it but I found that its MT6572 so I left my all thoughts.
Now lets see requirements, downloads and tutorial to root Karbonn Smart A26.
Downloads
- Framaroot 1.6.x application, I am giving you the latest one. Download from here.
Requirements
- Karbonn Smart A26 charged up to 70%
- USB Debugging enabled- Open Settings, go to Developers options and enable it. Then enable USB Debugging from there.
- Framaroot Application, download link given at Downloads section.
How To Root Karbonn A26 Smart
- Download the Framaroot Application and move it to your SD card.
- Now go to Settings > Security > Mark Unknown Sources to install Framaroot application.
- Install the Application from ES File Manager or any file explorer.
- Open the Application.
- Click on Super SU and tick on Boromir exploit. Wait for some seconds.
- A popup will appear Success :-) ... Superuser and su binary installed. You have to reboot your device. If you saw this, that means youve successfully rooted your A26.
- Reboot your device.
Now, youve rooted your device. Dont try anything that might fail the boot like ChainFire 3D, trying some applications that modify kernel/system files etc.. If you got SuperSU file in your App drawer, then it means it is rooted.
but you can cross check if it is rooted or not by using some applications like Root Checker from Play Store.
Enjoy your rooted device and if youre having any problems while rooting Karbonn Smart A26, shoot a comment here.
Friday, September 26, 2014
Root Uninstaller Pro Working v5 3 Apk Files

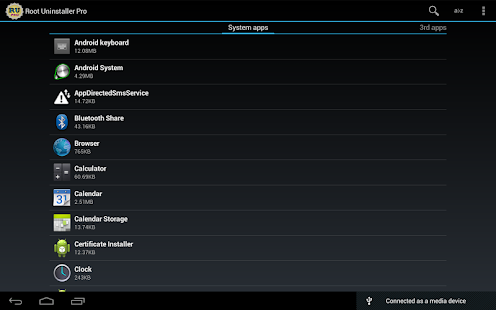
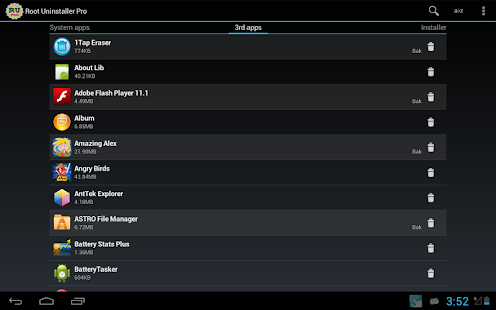
Very fast and simple uninstaller tool on single click for uninstalling both SYSTEM and REGULAR applications.
For ROOT+NAND unlocked devices:
Uninstall system applications.
Freeze or disable bloatware, stock and regular applications (keep updates)
Defrost or enable applications (Free trial or PRO)
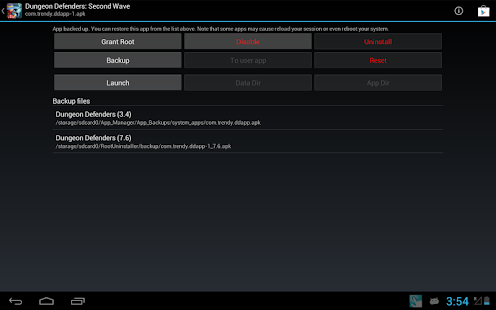
Backup system application .apk to sdcard (that can reinstall later)
Restore backed up applications.
Reset applications to fresh install state.
Delete definitively system applications.
Hide my App: launch a frozen app and automatically re-freeze on app closing (Pro only, tap on Launch->Freeze button )
Explore application data folder, code folder (ex. edit preferences, need AntTek File Explorer)
For NON-ROOT devices:
Quick APK list to show all available .APK files on SDCard
Keep Market reference and can restore after factory reset/change devices.
Manage to clear data, cache (manually)
Manage .apk files: delete, install, install as a system app (PRO)
Single click to uninstall a listed applications (Batch uninstall).
Rapid load application list.
Display application name, icon, package name.
Exclude system applications (that you can not uninstall)
Filter by third-party applications, system applications, applications on sdcard. backup applications or frozen applications
Support large screen (ex. tablet) views.
Explore application data folder, code folder (ex. edit preferences, need AntTek File Explorer)
For ROOT+NAND unlocked devices:
Uninstall system applications.
Freeze or disable bloatware, stock and regular applications (keep updates)
Defrost or enable applications (Free trial or PRO)
Backup system application .apk to sdcard (that can reinstall later)
Restore backed up applications.
Reset applications to fresh install state.
Delete definitively system applications.
Hide my App: launch a frozen app and automatically re-freeze on app closing (Pro only, tap on Launch->Freeze button )
Explore application data folder, code folder (ex. edit preferences, need AntTek File Explorer)
For NON-ROOT devices:
Quick APK list to show all available .APK files on SDCard
Keep Market reference and can restore after factory reset/change devices.
Manage to clear data, cache (manually)
Manage .apk files: delete, install, install as a system app (PRO)
Single click to uninstall a listed applications (Batch uninstall).
Rapid load application list.
Display application name, icon, package name.
Exclude system applications (that you can not uninstall)
Filter by third-party applications, system applications, applications on sdcard. backup applications or frozen applications
Support large screen (ex. tablet) views.
Explore application data folder, code folder (ex. edit preferences, need AntTek File Explorer)
Google Play
v5.3 APK FILE: HERE
Tags: Root Uninstaller Pro apk, Root Uninstaller Pro apk download, Root Uninstaller Pro for android, Root Uninstaller Pro v5.3 full version
Dont like stock or system applications? Its for you. This application can freeze pre-installed applications on your phone and more.
Root Uninstaller Pro v5.3
Size: 1.7 Mb | Android: 2.0.1 and up
Tuesday, August 19, 2014
Root Call Blocker Pro Full Version 2 2 3 18 Apk Files

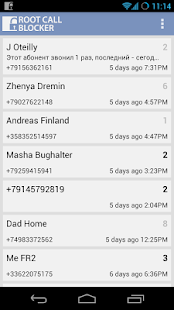
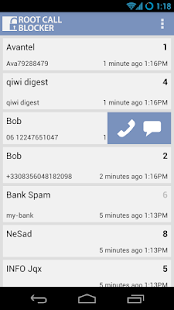
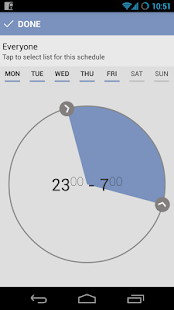
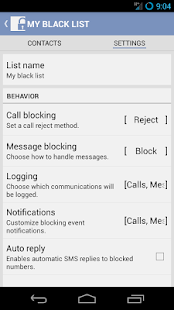
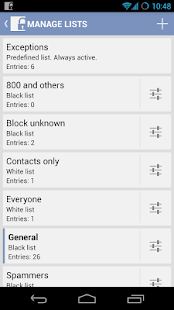
Stop bill collectors and text message spammers 100% of the time with our unique root-enabled call manager. Now with better everything!
Unlike other call filters, Root Call Blocker silently blocks calls at a system level. You need not even know its working and can choose to be notified only if specific numbers are blocked.
Unlike other call filters, Root Call Blocker silently blocks calls at a system level. You need not even know its working and can choose to be notified only if specific numbers are blocked.
Whats New:
v2.2.3.18 update:
Fixed showcase crash on small screen phones.
Fixed rare 00:00 schedules bug.
Fixed crash on invalid pointer id.
Fixed minor issues from user reports.
v2.2.3.17: HERE | v2.2.3.16B: HERE | v2.2.3.14: HERE | v2.2.3.10: HERE
Download full version apk file v2.2.3.8: HERE
v2.2.3.18 APK FILE: HERE or HERE
v2.2.3.18 update:
Fixed showcase crash on small screen phones.
Fixed rare 00:00 schedules bug.
Fixed crash on invalid pointer id.
Fixed minor issues from user reports.
v2.2.3.17: HERE | v2.2.3.16B: HERE | v2.2.3.14: HERE | v2.2.3.10: HERE
Download full version apk file v2.2.3.8: HERE
v2.2.3.18 APK FILE: HERE or HERE
Google Play
Tags: Root Call Blocker Pro apk, Root Call Blocker Pro apk download, Root Call Blocker Pro for android, Root Call Blocker Pro v2.2.3.18 full version
Root Call Blocker 2 is a powerful call, SMS and MMS blocker for root users.
Root Call Blocker Pro APK v2.2.3.18
Size: 4.2 Mb | Android: 2.3 and up
Size: 4.2 Mb | Android: 2.3 and up
Tuesday, July 29, 2014
How to unlock bootloader and root Motorola Moto G
Did you get Samsung Google Motorola Moto G? Thats great because this device is having nice specifications, but what about rooting it? Then it will be ICING ON THE CAKE! Then, you can try hundreds of things that only rooted users can get on Android. I know you might be thinking of the risk, then I must tell you that this is a very simple and a noob-proof guide. Anyone can do this. You just require some basic things like ADB (to reboot, if you dont know how to reboot it to bootloader/fastboot) and a computer, and fastboot for unlocking the bootloader. After the bootloader is unlocked, we can proceed to our main guide, i.e. How To Root Motorola Moto G. Without rooting you cannot enjoy the Android device. In my home, every device is rooted and thats fun because after that I can run the games flawlessly on some of my old devices like Micromax A87 Ninja 4.0, my other devices are high-end but still, I enjoy some applications like Xposed Module Installer with cool mods like Gravity Box, Xprivacy etc. Not only Xposed, there are many many things which will make your Android device best in your friends!
The device is high-end with some bright specifications like Quad Core 1.2 GHzCortex-A5 Cortex-A7, GPU: Adreno 305, Snapdragon 400 Qualcomm chipset, 1 GB RAM, 4.5 inch IPS LCD DIsplay and thats all for rupees 11158 (180$). That is cool, but you know that you can try some damn cool ROMs like CyanogenMod 11 (let developers build it first, thats the best ROM, believe me.) etc.
Rooting simply means getting superuser permissions so you can edit the main system files (like System and Data). As I said, rooting is just easy. Just some commands to unlock bootloader and a script and woh! its rooted. It wont take more than 10 minutes to unlock the bootloader and root it.
The device has already got Android 4.4 Kit Kat update, and thats the best thing about Motorola, not like Samsung! Samsung usually releases update after more than 1-4 months of the release of the Android update which users can already get by Custom ROMs.
I know you are thinking, that the device has excellent specifications then why do I root it? I know it happens. I also got Samsung Galaxy S3 and I was also in same situation but finally I ended up in rooting it in less than 1 day after buying it and installed Custom ROMs! Anyway, its your wish to root it or not. I must proceed with this guide:
Things required to root Motorola Moto G:


The device is high-end with some bright specifications like Quad Core 1.2 GHz
Rooting simply means getting superuser permissions so you can edit the main system files (like System and Data). As I said, rooting is just easy. Just some commands to unlock bootloader and a script and woh! its rooted. It wont take more than 10 minutes to unlock the bootloader and root it.
The device has already got Android 4.4 Kit Kat update, and thats the best thing about Motorola, not like Samsung! Samsung usually releases update after more than 1-4 months of the release of the Android update which users can already get by Custom ROMs.
I know you are thinking, that the device has excellent specifications then why do I root it? I know it happens. I also got Samsung Galaxy S3 and I was also in same situation but finally I ended up in rooting it in less than 1 day after buying it and installed Custom ROMs! Anyway, its your wish to root it or not. I must proceed with this guide:
Things required to root Motorola Moto G:
- ADB and Fastboot: You can get this easily from the internet but they are of huge size but I have compressed it for you, and thats only for 500 KB! Original size is more than 400 MB actually, so simply download it from here: Click HERE to download my compressed ADB and Fastboot.
- A computer: You just need it to use ADB and Fastboot.
- USB Drivers: Click here to download them from the official Motorola website. Just install them and accept all the warnings!
- USB Debugging: Go to Settings>About Phone and tap on Build Number 7 times so it will enable Developer Options. Click back and there will be a new option Developer options there. Open it, enable it and enable USB Debugging too.
How To Unlock Bootloader of Motorola Moto G to root it:
- Unzip the ADB and Fastboot which you recently downloaded to your computer.
- Press and hold Shift and press Right Click on the folder in which you extracted the files. Now click on the Open command window here option.
- CMD will open soon. Type fastboot oem get_unlock_data and press enter.
- Open This webpage and enter your email ID and sign in. There enter your Bootloader details which you got from the CMD. ENSURE THAT YOU DONT ADD ANY SPACE IN THE CHARACTERS.
It will be like this:
<bootloader> IHJFDHUDHDSUFHSUFHDSFIGHFIGHI
<bootloader> HDUFHUFGHFUGHFUGHFUGHFUGHF
<bootloader HUHGFUGHFUGHFUGHFIGHFIGHFIGH
In the website enter IHJFDHUDHDSUFHSUFHDSFIGHFIGHIHDUFHUFGHFUGHFUGHFUGHFUGHFHUHGFUGHFUGHFUGHFIGHFIGHFIGH. I hope you got that. - Click on Can my device be unlocked? and click on I agree on the bottom of it.
- Now open the email which you registered with Motorola and you will get a code in it.
- Copy the code and open the command prompt window.
- Type "fastboot oem unlock YOUR 20 DIGIT CODE HERE" and press enter.
- Wait few seconds and it will reboot itself.
- Done.
Now lets see how you can root this device.
How To Root Motorola Moto G after unlocking bootloader:
- Switch off your device after the reboot.
- Press and hold Power button + Volume Down buttons simultaneously for some time until the screen glows.
- Now you will be in the Bootloader mode.
- Connect it to PC again via USB cable.
- Download the superbooting tool. (Link provided in the downloads.)
- Double click on superboot-windows.bat file.
- It will root your unlocked device soon and will reboot itself.
- Done.
Heres YouTube video uploaded and made by me on this topic:
So it was an easy process I think? Having any problem? Shoot a comment here. I am there to help you.
Sunday, July 27, 2014
SCR Screen Recorder Pro ★ root Paid v0 11 8 beta Download Apk

SCR Screen Recorder uses hardware accelerated video encoding to achieve best quality screen recording on any device. Its the only video recorder on the market supporting Tegra device including Nexus 7.
Download: Full version apk file Below:
v0.11.8-beta: HERE | v0.11.7-beta: HERE | v0.11.5-beta: HERE | v0.11.4-beta: HERE
Google Play
Whats New:
New graphics.
Couple UI bugs fixed.
2GB video file size limit removed.
Improved default settings selection.
Fixed error R213 introduced by previous updates on some devices.
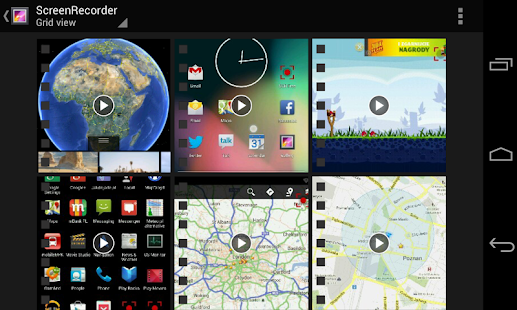
Record great quality screencasts directly from your phone or tablet!
SCR Screen Recorder Pro ★ root APK v0.11.8-beta
Size: 3.5 Mb | Android: 4.0.3 and up
Size: 3.5 Mb | Android: 4.0.3 and up
Friday, June 20, 2014
How To Root Samsung Galaxy S Duos S7562
Got Samsung Galaxy S Duos and get rid of those crappy lags? Youre at right place! but, for making it faster, you first need to root your Samsung Galaxy S Duos and then apply some tweaks or some cool ROMs. The device is having great, good okay okay type specifications but if I had this 10 thousands, I would have surely bought any other device.
I tried Samsung Galaxy S Duos of my friend and found that the RAM was good but the processor was WORST like anything! It was just 1 GHzDual Core. You cant even expect good gaming on this device, but the RAM is good! Anyway, I wont like to disappoint the customers and the people here who want to root their device.
Heres the list of some applications and modswhich can be run without root! which requires rooted Android device and which might improve your gaming performance or overall performance:
I tried Samsung Galaxy S Duos of my friend and found that the RAM was good but the processor was WORST like anything! It was just 1 GHz
Heres the list of some applications and mods
- ChainFire 3D (for gaming)
- Seeder (for performance and gaming, both)
- Game booster (as the name suggests, for gaming)
- Greenify (for multitasking and performance)
- Geeky Engine (for overall performance)
- Adrenaline Engine (for overall performance), etc.
What can you do after rooting your S Duos
- Remove Bloatwares
- Overclock (depends on if youve custom kernel or not)
- MODs which can improve battery backup
- More customization
- Can install Custom ROMs
- Access to some more applications and system root
But you need to root your device in any case to try these applications. And I gotta tell you something! Rooting is not at all very easy process and one can root his/her device in just some seconds.
Lets first see the specifications of Galaxy S Duos.
Samsung Galaxy S Duos is a decent device with some good and some bad specifications. The device is having 4 inch screen (480 x 800 pixels with 233 ppi pixel density). The screen size is not at all impressive, 4 inch is now-a-days not considered a big screen and you cant even enjoy your cool games and videos in Duos. It is having 4 GB Internal memory (and yeah! 4 GB is user available but only 1.82 GB user available). For boosting the games and running heavy applications, the device has got 768 MB RAM, and thats one of the thing which is good in the device. You get 1 GHz Cortex-A5 with Qualcomm MSM7227A Snapdragon chipset. Only because of it is Snapdragon, the perofrmance of the device is not WORST, if it didnt had Snapdragon, then it would be just a waste at this price amount. The device is powered with Adreno 200 GPU which might never help you to run the games without lag. The device is running on Android 4.0 Ice Cream Sandwich which can be further upgraded up to Android 4.3 Jelly Bean after rooting it! For picturing, you get a 5 Mega Pixels camera which can be also used to record videos at 30 FPS (Frame Per Seconds). Now lets quickly recap the specifications in a list.
Samsung Galaxy S Duos S7652 Specifications
- 4 inch screen with 480x800p resolution
- 4 GB Internal Storage which can be expanded up to 32 GB
- 768 MB RAM
- 1 GHz Cortex-A5 Qualcomm MSM7227A Snapdragon chipset and Adreno 200 GPU
- Android 4.0 Ice Cream Sandwich
- 5 MP camera with 30fps recording capability
Prerequisites
- Dont blame the author or blog- You cannot blame this blog or the author (me, Rohan) for bricking your device! If you stuck at bootloop, not booting or any other problem and will finger out me, then I would actually laugh at you.
- Support will be provided to the bricked devices- Bricked the device? We know how it feels! Dont worry, Im here to help you always.
- You lose warranty after rooting- If you will bring the device to service center for any software upgradation/hardware issue/software issue then you will be dropped out from the service center because youll be rooted. Always unroot and clear the flashes counter before going to service center after root.
Downloads
- UnlockRoot (Pro or free): Click HERE to go to the official Unlockroot page.
- USB Drivers- Click HERE to download [latest] Samsung USB Drivers
How To Root Samsung Galaxy S Duos S7562
- Install the USB Drivers (download it from the link given above) into your computer and reboot your PC.
- Download unlockroot (free or pro, both will work, but I would suggest free version because you dont need it again) and install it into your computer by following on-screen instructions.
- Attach your device [S Duos] to the computer and dont mount the SD Card, just leave it alone now.
- Open Unlockroot from the desktop.
- Youll get a popup do you want to add a battery saver app on your phone. Click yes/no.
- Click on that big green Root button.
 |
| Credits goes to me for taking the picture |
- Youll get a popup with rooted successfully & reboot your device text.
- Click on Yes and your device will reboot automatically!
- Rooted!
If you found an application called Supersu in your Application drawer, then it means you are rooted. Also, you can check with some applications like Root Checker to check if youre rooted or not.
Sunday, June 8, 2014
How To Root Google Nexus 5 Easily
Google Nexus 5 is the latest Android handset of Google. Nexus 5 was released with Android 4.4 KitKat. Nexus 5 is very well-engineered device. The shape of it is just mind-blowing. It was released in US first and then it was launched in India. Today, Nexus 5 is available for 29990 Rs in Flipkart. The device is having great specifications and decent amount. The device is actually having more features when we see the price of it. First, lets see what can you do after rooting your Nexus 5.
You can:

- ClockWorkMod Recovery- Change the Recovery to ClockWorkMod. It provides more features and has capability to backup or restore the current ROM.
- Install/Flash as many ROMs as you can- After CWMR, you can flash any ROM (Available for Nexus 5) like CyanogenMod 11, Miui ROM etc.
- Access/Modify the system directories- Without root, you cannot do anything like modifying System.
- Xposed Framework- After rooting, you can install Xposed framework which offers you features that you wont even get in your coolest ROMs! Change the color of Statusbar, add/remove toggles in Notification bar and other tons of features with the cool Xposed Modules like GravityBox, Xprivacy, App Settings and other mods. Note: Some Mods listed here might not be available for Nexus 5/KitKat because KitKat is new and the system format is bit different than GingerBread/ICS/JB.
- Overclocking- Overclock Nexus 5 with some custom Kernels! You can overclock your device if you have Custom Kernel and Nexus 5 has some kernels so you can try them for faster performance.
- Add Mods- You can also add some tweaks and mods to boost up your Nexus 5.
SomeMany MODs are available for Nexus 5. Some examples are: Geeky Engine, Adrenaline Engine, Slady Boost etc.
So now are you willing to root? But I must tell you that after rooting, you want be availed the warranty but you can avail it if you unroot it and flash Stock Firmware again. And, if you did anything wrong after Rooting Nexus 5 like Flashing Stock Firmware of Other Devices, Formatting some major partitions etc then you cant even boot. You wont be able to charge too! So just install/flash ROMs/MODs meant for your device.
Specifications of Google Nexus 5-
- Latest 4.4 KitKat Android OS
- 4.95 Inch Full HD Display with 1920 x 1080 Pixels and Corning Gorilla Glass 3, IPS Display, Less Glare, Wider Viewing Angle
- 2.3 GHz Quad-Core Qualcomm Snapdragon 800 Processor
- 2 GB RAM
- 16/32 GB Internal Storage
- NFC, LTE, WiFi support, Ceramic Power
- Wireless charging
- 8 Mega Pixels camera with Optical Image Stabilization, HDR+ Mode, Less Shake, Less Noise, Rapid Burst, Photo Sphere, 360 Deg View, Brighter Night and Sharper Action Shots
- 1.3 Mega Pixels front camera
- 2300 mAh Battery
- Compass, Ambient Light Sensor, Gyroscope Sensor, Accelerometer, Proximity Sensor, Pressure Sensor
The device is having great features thats why the stock was over in 1 Week in India! Okay, now lets move to the main part of this post i.e., Rooting Guide.
Downloads and Requirements
- AutoRoot Tool by ChainFire
- ADB/Nexus 5 Drivers [Installing guide provided]
- Nexus 5 Charged Upto 70%
- Computer
How To Root Google Nexus 5
- Follow the guide and install Nexus 5 Drivers into your computer.
- Download the Auto-Root tool by ChainFire and unzip them to your desktop in a folder.
- Turn of Nexus 5 completely and keep it untouched for 5 seconds.
- Reboot it to Bootloader by Pressing and holding Volume+ (up) button+ Voume - (down) button and Power button simultaneously untill the screen becomes blank.
- Open the folder in which you extracted CFs Auto-Root and click on
root-windows.bat if you are running Windows OS
root-mac.sh if you are running Macintosh/Mac OS
root-linux.sh if you are running Linux/Ubuntu
- Nothing left. Its rooted now!!
Reboot the device. If you found SuperSU application installed in your Phone, it means its rooted now! You can cross-check it by using applications like Root Checker from Play Store.
That was easy? Yeah, it was. Tip: You can install "TWRP" (Team Win Recovery Project) Recovery in Nexus 5 or "ClockWorkMod" Recovery for Nexus 5 by "ClockWorkMod Recovery Manager" Application from Play Store.
Sunday, April 13, 2014
RepetiTouch Pro root Paid v1 0 23 Apk Full Files
.png "RepetiTouch Pro (root) Apk v1.0.23 Download")
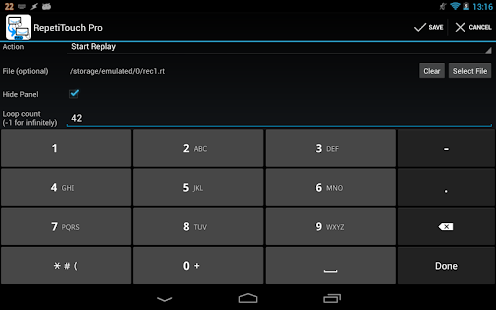
Just click the record button and start recording - the panel will stay on top almost all the time! When youre done, you can replay your touch events as easily. To access the menu, click on the star.
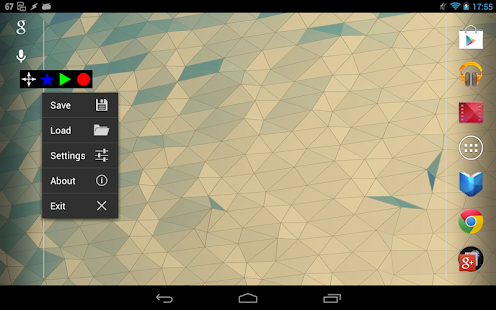
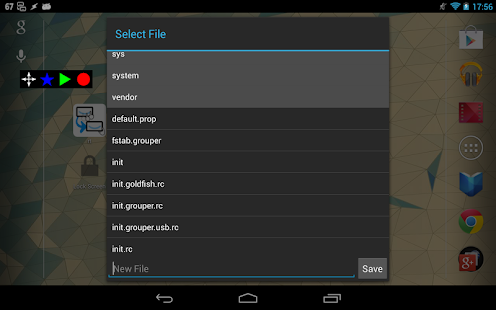
Features:
Record & replay global touchscreen input.
Record & replay hardware buttons or other device input via "Additional Input Events" (only on certain devices).
Locale/Tasker support (requires third-party automation tool).
Draggable, customizable panel (set icon size and opacity and panel background color).
Load & save records.
Auto-save/auto-load last record.
Loop replay with configurable loop counts (start by long clicking on the replay button).
Dim screen while replaying (only on certain devices).
Hide panel while replaying.
Appending record (start by long clicking on the record button).
Google Play
RepetiTouch Pro (root) full version apk file download Below:
v1.0.23 APK FILE: HERE or HERE
v1.0.23 APK FILE: HERE or HERE
Tags: RepetiTouch Pro (root) apk, RepetiTouch Pro (root) apk download, RepetiTouch Pro (root) for android, RepetiTouch Pro (root) v1.0.23 full version
RepetiTouch enables easy recording and replaying of touch events. Simply record and replay your touchscreen input!
RepetiTouch Pro (root) Apk v1.0.23 Download
Size: 242 Kb | Android: 2.3 and up
Wednesday, April 9, 2014
How To Root Micromax Canvas Magnus A117
Weve got another MTK Android Device by Micromax! Micromax recently announced the Micromax A117 Mangus. The device belong to Canvas series so we can compare it with other Canvases. I think the device is successor of Canvas HD or any other device [Canvas 2 Plus etc.]. The Mangus is a decent device with excellent features at good price. You get MT6589T Chipset clocked at 1.5 GHz with a Quad Core processor, 5 Inch HD display with 1280x720p resolution, Android 4.2 Jelly Bean, 1 GB RAM, 4 GB Internal Storage, 12 Mega Pixels camera capable to record full HD videos and 2 Mega Pixels front camera at just 13,229 Rs. Thats quite less for a device with Quad Core processor and 1 GB RAM as compared to the devices of Karbonn, Canvas HD, Celkon, Lava Iris, XOLO etc. The device chipset is MT6589T, as same as Micromax A89, Canvas 2, Canvas Turbo etc so we can easily root it by Famaroot application.

Downloads

Downloads
- Farmaroot Application [Note-: Only 1.6.x Version will work with this device. I tried Farmaroot 1.6.2 and that worked without any errors.]
How To Root Micromax Mangus A117
- Download the Famraroot application.
- Move it to your SD card.
- Install it like other applications.
- Open the application.
- Select SuperSU and click Boromir.
- You will see a message displaying that it is now rooted.
- Reboot
You can check that if it is rooted or not by applications like Root Checker.
Dont have Canvas Magnus? The great device is cheap and also having great specifications! You can buy this device from FlipKart at cheap rate!
Micromax Canvas Magnus A117 from FlipKart at only 13.7 thousands:
Dont have Canvas Magnus? The great device is cheap and also having great specifications! You can buy this device from FlipKart at cheap rate!
Micromax Canvas Magnus A117 from FlipKart at only 13.7 thousands:
Tuesday, April 1, 2014
BusyBox Non Root Pro v2 55

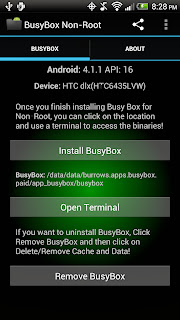
After having a rooted phone for years, I realize in which there are several software in which allow customers to modify their particular cell phones; nevertheless, when I recently bought a new phone this year, When i decided not to underlying the item and also When i realized the reason for rooting my own cell phone has been merely to obtain more linux tools. When i manufactured this specific simple application so as to support customers merely install BusyBox with no headache being rooted!
Whats New
- Fixed Symlink Problem with BusyBox - not working for previous users
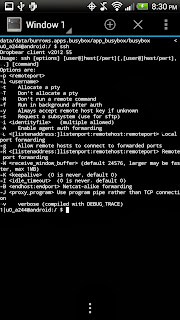
- Brand New: export PATH=$PATH:/data/data/burrows.apps.busybox/app_busybox/
- Old: export PATH=$PATH:/data/data/burrows.apps.busybox/app_busybox/busybox
- Renamed from "BusyBox Non-Root" to "BusyBox"
- Changed layout - very easier to use
- Fixed Security Exception - crash
- Newly Added Button - to copy the "export PATH" to clipboard
- Newly Added TextView - shows whether BusyBox is installed or not
- Clear Steps



For Non-Rooted Devices
GOOGLE PLAY
APK
Subscribe to:
Posts (Atom)